Extracting data embedded with JSteg
|
Steganography strength (is it easy to see there is hidden data?): Medium Cryptography strength (is it easy to recover the hidden data?): Low |
1. About JPG steganographyThere are not a lot of steganography programs which truly deal with JPG format of images, although it's the most widely used format for exchanging pictures. I think there are actually four of them that I can test under the most widely used OS, ie Windows (if you know more, please send me an email). Note that all of them are considered broken for now (people with the right tools can guess if there is something embedded in your image): - F5, which was recently developped by academic researchers specialized in steganography. Probably one of the most advanced programs publicly available, there is a lot of thinking behind it and a certain knowledge of what was done before, it uses methods to compensate for the introduced changes so statistical analysis is difficult. Yet it is considered broken, just like the other ones. Sources (in Java) available, of course. - JPHide/JPSeek/JPHSWin, from 1999, source code available. It uses Blowfish as a pseudo-random number generator. - JSteg, kind of old, apparently the first one to do steganography in JPEGs. No encryption. Source available. A graphical interface called JStegShell was coded later, and adds a few goodies like the possibility of encryption. - StegHide is the new kid on the block, open source and continuously developped. Looks like serious work. As I wrote before, some programs claim that they do JPG steganography, but they actually fake it, by fusing the data at the end, or by using a comment field in the header. Real steganography means mixing the hidden message information with the actual pixel information. That's what all these programs above do. To deal with JPG format, they all use the Independent JPEG Group's (IJG) library, which is probably the most advanced library to date. Let's have a closer look on JSteg. It has been written by modifying the IJG library, nicely adding a new option ("-steg filename") to the compiled executables. This program looks pretty old to me, but as it does not use encryption, I used it as an example of how to extract data from the complex JPG format. For this goal, I didn't use such monster as the IJG library (mainly because I'm not fluent with high-level languages). Instead I used a very nice JPEG library, 5 kilobytes long, written in assembler by Promethee [Eclipse], a french cracker and excellent programmer. This library is by construction a little bit limited, it won't open all kind of JPEG images (for example, it does not handle progressive encoded JPEG), but it decompresses nicely a typical JPG into a flat windows bitmap. As I don't care about the final BMP, I actually hacked the binary of this library (I didn't have the source anyway), patching it at runtime to hook a routine and extract the temporary by-product where the JSteg hidden information is stored: the quantized DCT (Discrete Cosine Transformation) coefficients. 2. The (complex) JPEG encodingFirst, a brief overview of how typical JPG lossy compression is achieved (Ii you are interested, there are many excellent tutorials about this on the net, like this one or this one in french, both well illustrated). There are many steps for the encoding. 1.1. Conversion from RGB to YCbCrJPEG files use a different color space than bitmaps. The three color coefficients (Red, Green, Blue or RGB) for each pixel are transformed into a new coding scheme: one luminance coefficient (the intensity - if you just keep this one you have a black and white image), and two chrominance coefficients (the actual color in a 2D grid defined by a Blue/Yellow and a Red/Green axis). At this point you have the YCbCr values. 1.2. Subsampling of the chrominance valuesBecause the human eye is much more sensitive to luminosity than it is to colors, we can already remove a lot of color information without really changing the perception we have of the image. Most of the time, 4 adjacent pixels are averaged to one value. So already at this step, we removed ((1/3*3/4)*2) of the image information, which is half. Not bad. At this point you have the subsampled YCbCr values. As an illustration, look at this color image (stolen from this excellent page):  If you don't look from too close, it's acceptable, right? Actually on this image the color information (both chrominance factors Cb and Cr) was subsampled by an enormous factor of 8! Which means that the color information on this picture is made by big 8x8 blocks of pixels. Here are images showing each channel only:
1.3. Discrete Cosine TransformThe remaining values are transformed, 8x8 blocks at a time, by a forward Discrete Cosine Transform, which is going to transform your values into frequencies. It sounds complex but it's not. It's just a matter of describing your numbers no more by their values, but by coefficients of a mathematical expression. Think about how easier it is to describe a line by the two coefficients a and b in the mathematical formula "y = ax + b" than by keeping the coordinates of hundreds of points that belong to that line. Ah, beauty of mathematics: you can describe an infinity of very particular points with just two coefficients! The formula here is more complex than a simple linear one, and, as its name implies, it involves a decomposition of your signal into several cosines functions of different frequencies. A little bit like Fourier transform. You will transform the 64 values into 64 frequency coefficients. In other words, you will describe 64 values with 64 coefficients. Now you're thinking... So what is the point? Replacing 64 values by 64 new values? No gain of space! Well, the point is that in "natural" images (remember JPEG is made for photography), most of these coefficients will be very low, and we can get rid (at the next step) of a lot of them, and still reconstruct the original values with a good accuracy. At this point you have the DCT coefficients. Still trying to give visual examples, here is on the left an example 8x8 block of pixel values (example from this page in catalan). It could be luminance or chrominance data, whatever you want. The 8x8 block on the right is after a forward DCT transform. The low frequency coefficient is on the top left. It's the highest value, because it encodes the data with the highest importance and the lowest frequency: basically the average value of all of this block pixels. See how these coefficients are still high around the top left corner, and then, the more you go to the bottom right (the high frequencies), they go down. We will remove a lot of these small values at the next step. Right now, if you do an inverse cosine transform from these coefficients, you will recover exactly the starting pixels values, minus the rounding errors. The main loss of information is on the next step.
1.4. QuantizationThe main lossy step: the remaining coefficients are "quantized", which means that they are divided one by one with a table of fixed values, and rounded. The higher the values on this table, the more details you will eliminate. You're actually going to eliminate the high frequency coefficients: think about removing the small wavelets on top of a big wave. The irregular spikes on a noisy experimental curve. Think about "smoothing". These tables are stored in the image header, and are actually what you define when you ask your image program to save a "X% quality JPG" (try to save a JPEG with a 1% quality, and check the file with an hexa editor, and you will see a bunch of "FF" at the beginning of the file: these are the quantization tables, each with 64 very high values). At this point you have the quantized DCT coefficients. Most of them are equal to zero. It's where JSteg hides the data (and all other JPG steganography programs I've checked), by overwriting their LSB. As a mono-dimentional visual example, here is a curve, the red one, made by a sum of two sine waves. One with a low frequency, one with a high frequency. After JPG quantization, you will be left only with the low frequency component, the blue one. It's intuitively simple to understand: you're going to keep the main variations, or the most significant information (low frequency), and eliminate the less important details (high frequency).  Let's have a look at the same 8x8 block we already mentionned as an example above. On the left, the same DCT coefficients from above. On the middle, the quantization table that we are going to use. It's actually the real default table for luminance included in the JPEG specification. On the right, the result of the quantification. As you can see, a whole lot of quantized coefficients are now zero: 58 out of 64!. That is going to compress very well on the next steps. Remember once again that JSteg is going to hide the data by slightly changing these coefficients.
1.5. Zig-Zag orderingNow you will be left, in each 8x8 block, with a few coefficients still alive, and a whole bunch of zeroes. The first step here is to re-order all the coefficients in what is called the "zig-zag" order. It's basically done to put a maximum of zeroes close to each others, because it will compress better on the next step. It's called "zig-zag" because it goes this way through a 8x8 block, and looking at the 8x8 example block above, you understand why: most of the zeroes are close to the bottom right of the matrix. The zig-zag:  1.6. Lossless compressionThe last compression steps are lossless. We have lost enough information already. I'm not going to enter into details, but two different algorithms are used. A simple RLE (Run-Length Encoding, because there is a bunch of zeroes here) is used to compress the high frequency coefficients, and a DPCM (Differential Pulse Code Modulation, because it's generally close to the precedent one) is used to compress the first low frequency coefficient. Then a classic Huffman algorithm is used to compress everything. The Huffman trees are stored in the JPG header. 1.7. We are done!And now you have the final JPG raw binary data, or what you see in a JPG file. At this point it's easy to understand why most people who code steganography programs don't want to deal with JPG: the actual image information is buried through several layers of compression and mathematical transformations. Even more, I've just described the canonical JPG: there are several variations. Most people (including me) prefer to play around with a flat, simple and uncompressed format like BMP, where the pixel information is easily accessible. 2. How to hack Promethee's JPEG libraryFrom now we understand more or less what a JPEG library is supposed to do to decode a JPEG: the same steps I explain above, but of course in reverse order. Written in one big phrase, more or less, Promethee's library, when fed with a JPG image, is going to do this:
Look at the red asterisk. It's at this exact point that we need to hook the library to get what we want, the quantized DCT coefficients in zig-zag order. After some debugging, I've found that the library, after having decoded a block of DCT coefficient, will call a routine to de-zigzag them and put them back in natural order. I will simply replace this call by a call to my own program. I just need to calculate where this relative call should go, save the original call, replace it by the new value, and that's it. Once I am in my own routine, I transfer the current DCT coefficients from the library memory to my own memory, and finally jump back to where the original call was supposed to go. I don't have to worry about the next ret, because the return offset is still on top of the stack, I didn't touch it. Look at the source code to understand. This trick is a typical reverser / cracker / virus writer method to hook routines. Dirty low-level coding, just as I like :) At the end, I let the library finish its work which I'm not going to use. I now have all the quantized DCT coefficients, and that's all what I need to do the next step, because the data embedded by JSteg is right here, in these coefficients. 3. How to extract the data from the quantized DCT coefficientsAlthough JSteg deals with the complex JPG format, it embeds the hidden information in a very simple way, which is even detailed nicely in the readme file. The hidden information is not even encrypted, and that's why I chose this steganography program as an introduction to JPG steganography. Basically, the DCT coefficients which are equal to zero or one are not modified. The other ones are used to embed sequencially one bit of the hidden information, by overwriting their Least Significant Bit (LSB). The hidden information has this format (copy-pasted from the readme, a bit simplified):
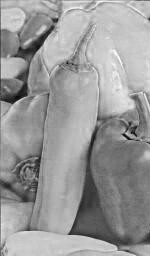
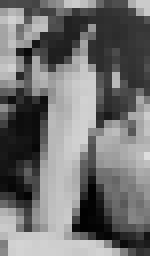
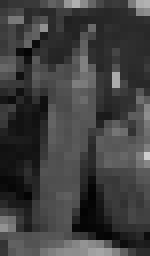
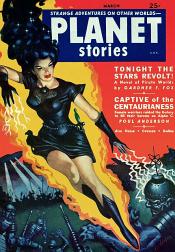
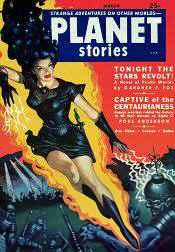
So now I know this, I simply extract one bit at a time the LSBs of the first five DCT coefficients to get the size of the size (the field "A"), get the of the next bits to have the size of the hidden data (the field "B"). And finally I can extract the hidden data (the field "C"), reconstructing bytes from the extracted bits. 4. A few notes4.1. CrashesPromethee's library does handle a single type of JPEG image: the regular baseline sequencially encoded one. For example, JPEGs progressively encoded, JPEGs containing a low-definition thumbnail, JPEGs using an exotic sub-sampling, etc, will not work. And when the library cannot handle an image, there is no error message: it just crashes. So if you get a crash, read it like a "this JPEG is not supported" error message :) 4.2. Extraction, not detectionMy program will not tell you if an image has or has not some hidden data inside. It is not a detection tool. It just extracts blindly the hidden data, even if there is no hidden data. However, if I detect an obvious problem, for example, while decoding the size of the data, I find that this size is zero or bigger than the amount of available space, I will tell you that it looks like there is no hidden data. 4.3. FilesYou need to have the included "Jpeglib.dll" in the same directory. It's a UPX-compressed 5 Kb file. The extracted data will be written on the same directory under the name "extracted.bin". 4.4. If you use JStegShellThis GUI for JSteg is nice and easy to use. But it does modify the format of data, in a very simple manner. It adds the name of the hidden file (if you chosed this option) at the beginning. Then, after your hidden file, it adds a byte with the length of this name. And finally, as a signature, the string "korejwa" (the name of the author). Anyway. As long as you play around with hiding text or simple data, it's obvious. I don't feel like handling this. By the way, this GUI is nicely done, but if uses temporary files and does not wipe them after use, it just delete them. Typical weakness, just like the odd program called Steganography. 5. The program and an exampleEnough talking. Finally, here's my program, with source: JSteg_Data_Extractor.zip. You can test it on the following images. [Note: I've just identified a small bug in some particular cases, will correct it later - should not really impact on the stuff - gniiiiiii] The demo image is the cover of an issue of "Planet Stories", a scifi pulp from the fifties with gorgeous illustrations. It's a small 15 kb JPEG image. The image on the left does not contain any message. Inside the image on the right, there is something hidden: the poem "If", by Rudyard Kipling, english version, 1.5 Kb:
Just to continue with this hands-on example, the next table shows on the left the very first 8x8 block (so, 64 bytes) of quantized DCT coefficients of the above left original JPEG image without any hidden text. On the middle is the exact same block after hiding the text, so corresponding to the above right image. Finally, on the right is the same block, but just the LSB of each byte. I've underlined the bytes modified on their LSB by JSteg (note that when the LSB is already, by chance, set at the good value, JSteg does not need to modify it). The color code is the same one I used for describing the JSteg data format two chapters ago: red for the field "A", the first 5 bits field containing the size of the next size field; yellow for the field "B", the hidden data size field; and blue for the field "C", the real hidden data. Remember that the bytes equal to 0 or 1 are not taken into consideration.
Let's decode this first 8x8 block by hand to understand how my program works. The result is: Field A: always 5 bits to decode: Field B: 11 bits to decode: Field C: 1553 x 8 bits to decode, starting with: Wow, it works! My program just automatizes this process and will extract the whole hidden data. And that's it for today. Have a nice day! Guillermito, February 18th 2004 |